Week Three - Ideation and Prototyping
Learning Objectives
Section titled “Learning Objectives”- Gain a deeper understanding of the role of design and prototyping in the UXD process.
- Acquire and practice design and prototyping skills using appropriate tools.
- Be introduced to key design software available for use throughout the term.
Slides
Section titled “Slides”Ideation
Section titled “Ideation”Definition and Goals
Section titled “Definition and Goals”Ideation is a creative process intended to generate a multitude of ideas.
Learn more: Stage 3 in the design process - Ideate
Goals
- Encourage innovative thinking without restrictions (time, resources, technical limitations, budget, etc.).
- Incorporate perspectives of multiple stakeholders.
- Discover unexpected areas of innovation.
- Generate a large volume of ideas to build on.
Principles of Ideation
- Maintain an open mind.
- Prioritize quantity over quality.
- Embrace divergent thinking.
- There are no wrong ideas.
Ideation techniques
Section titled “Ideation techniques”Explore foundational ideation techniques:
Learn and apply techniques such as brainstorming, braindumping, storyboarding, challenging assumptions, exploring the worst possible idea, SCAMPER, role-playing, and co-design/co-creation.
Brainstorming
Section titled “Brainstorming”
- Generating ideas in a group
- Leveraging the group’s diversity
- Building on one another’s ideas
Braindumping
Section titled “Braindumping”
- Similar to brainstorming, but done individually
- Simply write down your own ideas
- Combine ideas and build on them
Storyboarding
Section titled “Storyboarding”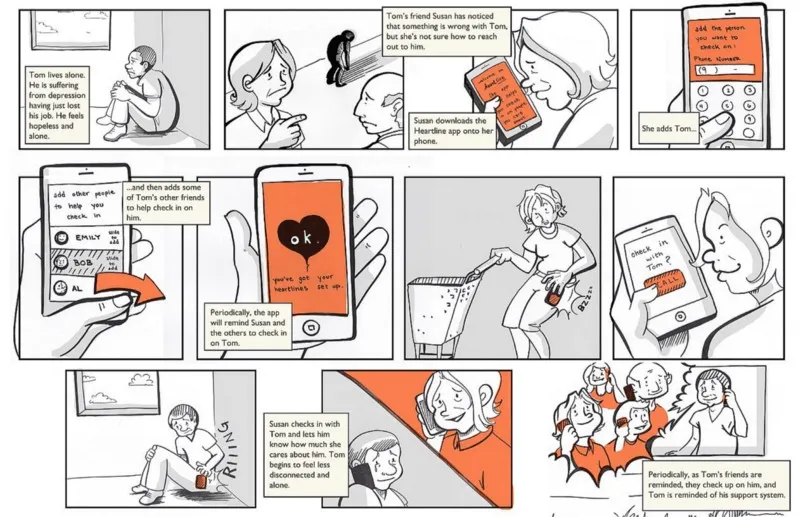
- Develop a story related to the problem you’re solving
- Bring the situation to life
- Explore different scenarios to see where the story goes
- Another resource
Challenging Assumptions
Section titled “Challenging Assumptions”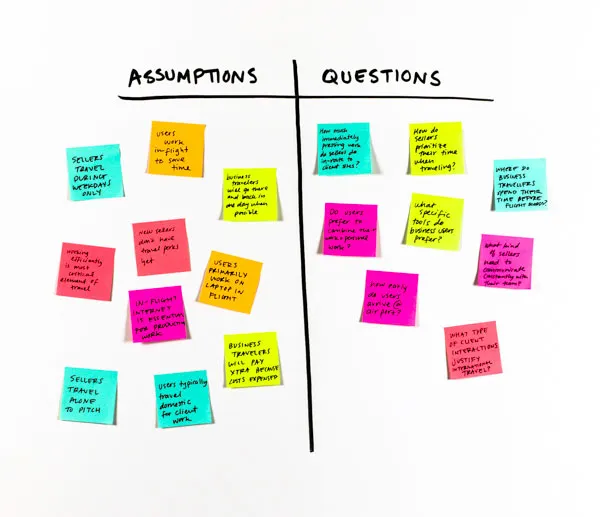
- Step back and consider the assumptions you have about the product
- Try to get
unstuckof current thinking - Are constraints truly constraints, or just what we’re used to?
Worst Possible Idea
Section titled “Worst Possible Idea”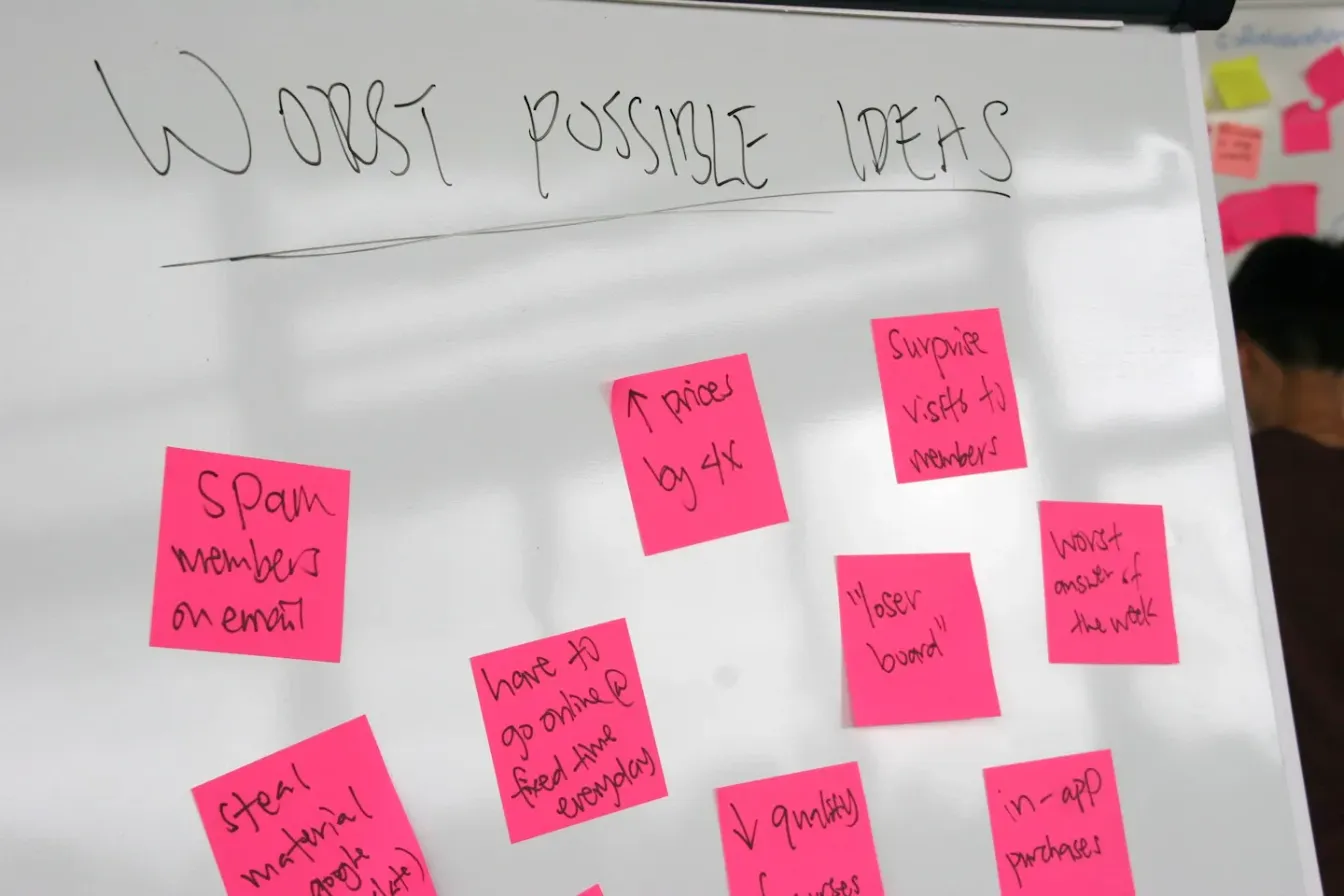
- Flip brainstorming on its head
- Bad, silly ideas to train the mind to think differently
- Easier to critique
- Low personal commitment
SCAMPER
Section titled “SCAMPER”
- Substitute
- Combine
- Adapt
- Modify
- Put to another use
- Eliminate
- Reverse
Role Playing
Section titled “Role Playing”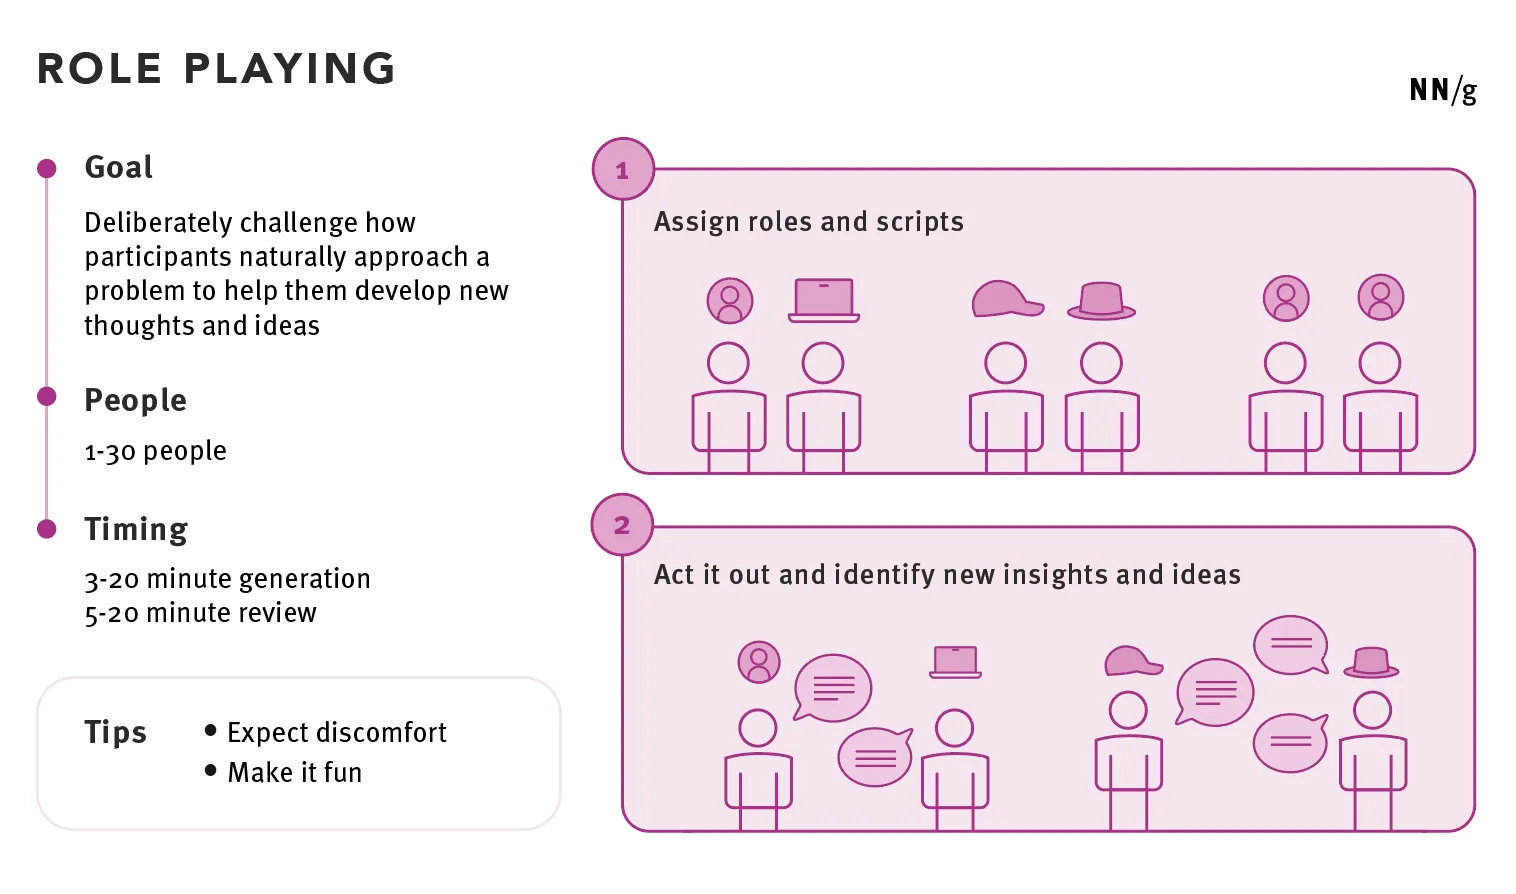
- Changes how participants think about something
- Develops new thoughts and ideas
- Can be uncomfortable for some
- The role of the system or another person
Co-Design / Co-Creation
Section titled “Co-Design / Co-Creation”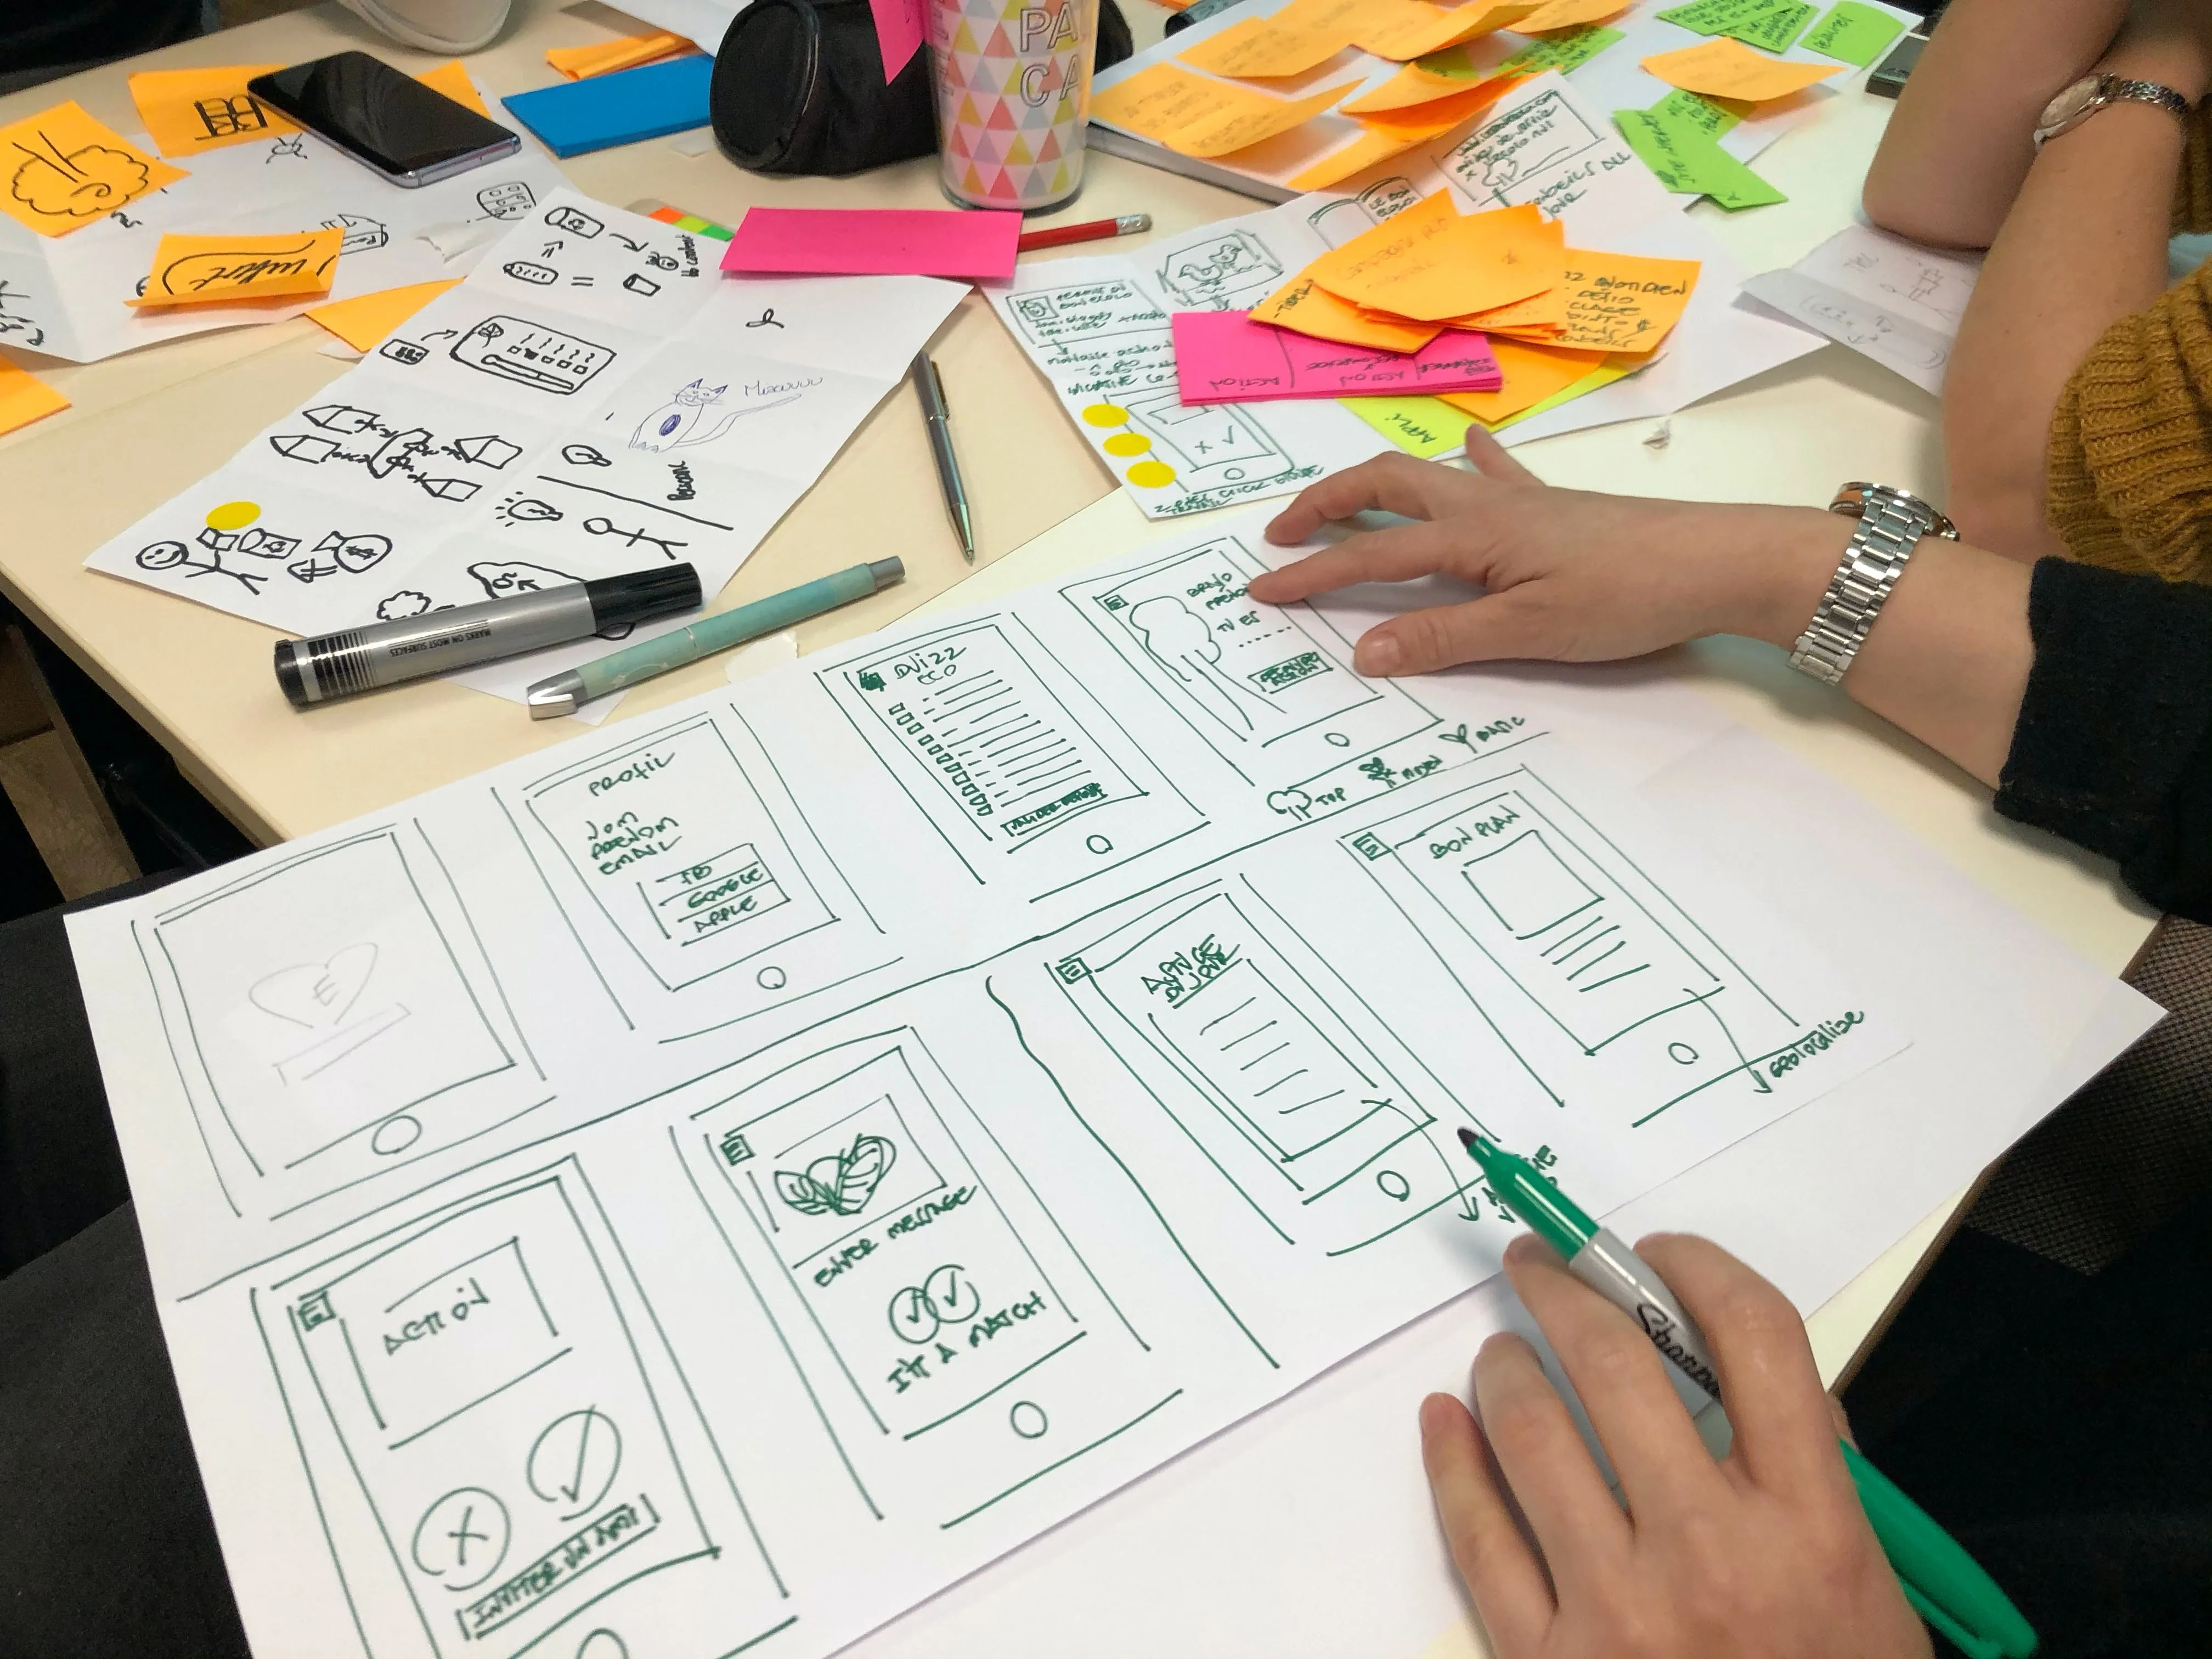
- Collages
- Cognitive and context mapping
- Storyboards
- Inspiration cards
- Modeling
- Paper prototyping
- Games
Brainstorming
Section titled “Brainstorming”Enhance your brainstorming skills:
For a successful brainstorming session, follow these guidelines:
- Set a time limit.
- Start with a problem statement.
- Defer judgment - no wrong ideas.
- Encourage open, “blue sky” ideas.
- Prioritize quantity over quality.
- Build on each other’s ideas.
- Be visual.
- Maintain one conversation at a time.
Explore physical and online brainstorming environments for optimal results.
Design Sprint
Section titled “Design Sprint”Engage with the design sprint process:
Watch these informative videos to delve deeper into the design sprint process:
Sprint: Tuesday
Sprint: Wednesday
Prototyping
Section titled “Prototyping”Definition and Goals
Section titled “Definition and Goals”A prototype is an early model or sample built for testing and learning purposes.
Goals
- Test design hypotheses.
- Learn, improve, and gain confidence in a product or idea before investing in implementation.
What to Test with a Prototype
Section titled “What to Test with a Prototype”When creating a prototype, it serves as a valuable tool for evaluating various aspects of a design. Here’s what you can test with a prototype:
-
Usability: Examine the layout, user interface, and overall ease of use to ensure that the design is intuitive and user-friendly.
-
Navigation: Confirm that users have access to all necessary navigation elements required to complete their tasks efficiently.
-
Functionality: Test the interactive elements within the prototype to ensure they perform as expected. This includes buttons, links, forms, and any interactive features.
-
Alternate Designs: If there are multiple design options for achieving the same goal, prototypes can help determine which design is most effective by observing user preferences and interactions.
-
User Feedback: Gather feedback from users on their experience with the prototype. Understand their preferences, pain points, and suggestions for improvement.
Elements of a Prototype
Section titled “Elements of a Prototype”Creating an effective prototype involves considering several key elements:
-
Scope: Determine the scope of your prototype by identifying the specific task or user flow you want to test. Ensure that the prototype includes enough screens to cover this scope adequately.
-
Fidelity: Choose the appropriate level of fidelity for your prototype. Low-fidelity prototypes may focus on basic layout and structure, while high-fidelity prototypes include detailed design elements and interactions.
-
Content: Include real or realistic content within your prototype. Meaningful text, images, and data should be incorporated to allow participants to respond as they would in a real-world scenario.
-
Interactivity: Determine the level of interactivity required for your prototype. Depending on your objectives, you may need to include interactive elements that simulate user actions and navigation through the prototype.
Determining What to Test
Section titled “Determining What to Test”To create an effective prototype, follow these steps for determining what to test:
Step 1: Define the Scope of Your Prototype
Choose a specific task or user flow that you want to test with your participants. List the screens and steps necessary to cover this scope effectively. Be mindful not to include too many screens, as it may overwhelm participants, or too few screens, as it might not provide enough context for the task.
Step 2: List the Content Needed for Each Screen
Decide whether you can use placeholder text or if meaningful content is required for participants to understand the task effectively. Consider whether certain elements, such as lists or filters, need to be included on the screens.
Step 3: Determine Fidelity
Assess what level of fidelity is appropriate for your testing objectives. Low-fidelity prototypes may be sufficient for testing basic layout and navigation. Mid-fidelity prototypes can simulate task flows and interactions effectively. High-fidelity prototypes are needed for testing micro-interactions, behaviors, and transitions.
Step 4: Decide on Interactivity Levels
Determine if your prototype requires interactivity. Not all prototypes need to be fully interactive. Interactive elements are essential for testing user interactions, animations, and complex behaviors. Consider the level of interactivity needed to fulfill your testing goals.
By following these steps, you can tailor your prototype to align with your specific testing objectives, ensuring that it effectively serves as a tool for evaluation and feedback.
Prototyping Methods
Section titled “Prototyping Methods”Prototyping is a crucial step in the design process, allowing you to create representations of your design concepts for testing and refinement. Depending on your project’s stage and complexity, you can choose from various prototyping methods:
1. Paper Prototype (Early design stage):
- Purpose: Paper prototypes are used in the early stages of design to gather feedback on user interface (UI) and flow.
- How it works: Designers create hand-drawn or printed versions of screens and interactions on paper. These prototypes simulate the user interface and allow designers to walk users through scenarios by manually switching pages or elements.
- Advantages:
- Inexpensive: Paper prototypes are cost-effective and easy to create.
- Quick: They can be generated rapidly, making them ideal for early design exploration.
- Collaborative: Design teams can work together to create and test paper prototypes.
- Low Fidelity: Minimal detail in paper prototypes prevents users from getting distracted by visual elements.
- Early Feedback: They facilitate early user feedback on basic layout and flow, helping to identify major usability issues.
2. Digital Prototype (Any design stage):
- Purpose: Digital prototypes can be created at any stage of the design process and allow for more interactive testing.
- How it works: Designers use prototyping tools or software to build digital representations of the user interface. These prototypes can simulate user interactions, transitions, and animations.
- Advantages:
- Interactivity: Digital prototypes enable testers to click through screens, interact with elements, and experience the design’s functionality.
- Testing Flexibility: They can be used to test various aspects, from usability to user flows.
- Iteration: Digital prototypes are easy to modify and refine based on user feedback.
- Realistic Experience: They provide a more realistic user experience compared to paper prototypes.
- Usability Testing: Well-suited for testing navigation, functionality, and user interactions.
3. Dev Prototype (Complex designs):
- Purpose: Dev prototypes are used when a design involves complex functionality or lacks complete requirements.
- How it works: Developers create functional prototypes with code. These prototypes can replicate database calls, complex interactions, or intricate workflows that are difficult to simulate in design prototypes.
- Advantages:
- Realistic Functionality: Dev prototypes closely mimic the final product’s functionality.
- Complex Interactions: Ideal for testing intricate user interactions, calculations, or dynamic content.
- Requirements Exploration: Useful when complete design and technical specifications are not available.
- Integration Testing: Ensures the integration of various components and systems.
- High Fidelity: Offers a high level of fidelity for evaluating complex designs.
Choosing the right prototyping method depends on your project’s specific requirements, timeline, and the level of detail and interactivity needed for testing. It’s common for designers to start with low-fidelity paper prototypes for initial feedback and gradually transition to digital or dev prototypes as the design becomes more refined and complex.
Design Sprint
Section titled “Design Sprint”Explore the prototyping phase of the design sprint process:
Watch the informative video for a better understanding: